Struggling with a hot, stuffy attic or unexplained roof issues? Many homeowners face the dilemma: Can I improve attic ventilation myself, or should I hire professionals? As experts at Care Roofing Inc. Roofing Excellence Solutions, we’ve seen it all—from simple DIY wins to complex projects demanding pro intervention. This guide dives deep, drawing from years of hands-on experience to help you decide wisely.
Why Attic Ventilation Matters More Than You Think
Attic ventilation isn’t just about comfort; it’s crucial for your home’s longevity. Poor ventilation traps heat and moisture, leading to shingle damage, wood rot, and skyrocketing energy bills. Imagine summer heat baking your roof from below, shortening its life by years. Proper airflow regulates temperature, prevents ice dams in winter, and keeps moisture at bay, protecting your biggest investment.
Experts recommend one square foot of ventilation per 150 square feet of attic space, split evenly between intake (soffit vents) and exhaust (ridge or gable vents). Imbalanced systems cause 80% of premature roof failures. We’ve inspected countless attics where blocked vents or inadequate coverage turned minor issues into major repairs costing thousands.
Understanding Your Attic Ventilation Needs
Before deciding DIY or pro, assess your setup. Start with a thorough inspection: crawl into your attic (safely!) and check for signs of trouble. Look for dark streaks on rafters indicating moisture, musty odors signaling mold, or shingles curling from heat damage. Measure your attic floor area and calculate required vent space using the 1/150 rule.
Common problems include insufficient net free ventilation area (NFVA), where actual airflow is less than rated due to screens or obstructions. Soffit vents often clog with debris, while ridge vents get painted over, slashing efficiency. In one case we handled, a homeowner’s attic had only 40% of needed ventilation, causing chronic leaks—fixed by adding balanced intake and exhaust.
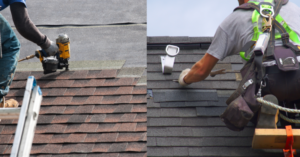
DIY Attic Ventilation: When and How to Do It Right
DIY shines for straightforward upgrades on accessible attics with no structural complications. If your space is open, under 1,000 square feet, and lacks hazards like wiring or asbestos, you can boost ventilation affordably. Here’s a step-by-step guide based on proven methods we’ve recommended to clients.
- Inspect Thoroughly: Use a flashlight to spot blockages. Clear soffits with a shop vac and compressed air. Remove insulation blocking vents—common in 70% of older homes.
- Calculate Needs: For a 1,200 sq ft attic, aim for 8 sq ft total vent (4 intake, 4 exhaust). NFVA matters: a 12×12″ vent might only provide 50 sq in of free air.
- Install Intake Vents: Add or replace soffit panels. Cut precisely with tin snips, seal edges with caulk. Continuous strips outperform spot vents for even flow.
- Add Exhaust: Gable vents are DIY-friendly—drill pilot holes, secure with screws. For ridges, ridge vent kits slide under shingles but require careful roof cutting.
- Test Airflow: On a windy day, hold tissue near vents; it should flutter. Smoke pencils reveal dead zones.
Materials cost $200-800 for most homes. Tools: ladder, drill, snips, safety gear. Time: 4-8 hours. Success stories abound—homeowners adding baffle vents over insulation to create air channels, dropping attic temps by 30°F.
But beware pitfalls. Over-ventilating exhaust without intake creates negative pressure, pulling conditioned air from your home. Improper sealing invites pests. We’ve seen DIY ridge cuts leak because shingles weren’t lifted correctly, leading to interior damage.
The Risks of Botched DIY Attic Ventilation
DIY sounds empowering, but errors compound. Cutting rafters accidentally compromises structure. Ignoring HVAC ducts in attics risks condensation. Asbestos in old insulation demands pros—disturbing it releases fibers linked to health risks.
Statistics show 60% of DIY ventilation attempts fail long-term due to poor NFVA calculations or installation flaws. One client tried adding gable vents himself but blocked soffits unknowingly, worsening moisture. Heat buildup melted roof decking, costing $5,000 to repair.
Safety first: falls from ladders cause thousands of injuries yearly. Confined spaces amplify risks like carbon monoxide buildup if vents obstruct flues. Without experience, you might void warranties or violate codes requiring balanced systems.
Signs You Need Professional Attic Ventilation Help
Opt for pros if your attic shows red flags: complex roof pitch, limited access, existing leaks, or integrated solar/wiring. Large homes (over 2,000 sq ft) or those with spray foam insulation need custom solutions pros excel at.
Professionals use infrared cameras to map heat loss, manometers for precise airflow measurement, and blower door tests for whole-house balance. They integrate expert attic venting strategies like powered attic fans or solar vents when passive fails.
Benefits of Hiring Professional Attic Ventilation Experts
At Care Roofing Inc., our team brings decades of expertise. We start with diagnostics: measuring current CFM (cubic feet per minute) airflow, which should hit 0.7-1.0 for optimal performance. Pros ensure code compliance, like International Residential Code’s 1/150 ratio.
Key advantages:
- Precision: Custom vent sizing avoids over/under-venting. We’ve retrofitted homes with hybrid systems boosting efficiency 50%.
- Warranties: 20-50 year guarantees on materials/labor.
- Safety: OSHA-trained crews handle heights, hazards.
- Longevity: Proper install extends roof life 10-20 years, saving 15-25% on energy.
- Added Value: Air sealing during venting cuts drafts 40%.
Costs range $1,500-5,000 depending on scope, but ROI via lower bills and avoided repairs pays off fast. One project: added ridge and soffit vents to a 1,500 sq ft attic, reducing energy use 22% per utility data.
Comparing DIY vs. Professional: Cost, Time, and Results
FactorDIYProfessionalCost$200-1,000 materials$1,500-5,000 installedTime1-2 days1 day, done rightEffectivenessVariable, 50-70% success95%+ optimal airflowRiskHigh (leaks, safety)Low (insured, expert)WarrantyMaterials onlyFull system, 20+ years
DIY saves upfront but pros deliver lasting value. For complex jobs, the gap widens—pros use tools like vent calculators ensuring NFVA perfection.
Advanced Ventilation Solutions from the Pros
Beyond basics, explore powered options. Attic fans pull 1,000-3,000 CFM, ideal for hot climates. Solar models run free, thermostats activate at 90°F. We’ve installed thousands, with clients reporting 40°F temp drops.
Turbine vents spin with wind for passive exhaust. Ridge vents provide continuous 18″ path, outperforming gables by 30% in tests. Pair with baffles (wood or foam chutes) to channel air over insulation.
For ultimate performance, combine with air sealing: caulk gaps, use foam for penetrations. This holistic approach, our specialty, prevents 90% of common failures. Check our comprehensive roofing services for integrated solutions.
Maintenance Tips to Keep Ventilation Optimal
Post-install, annual checks prevent decline. Clean soffits, inspect ridges for debris/bird nests. Trim overhanging branches blocking flow. Monitor attic temp/humidity—above 120°F or 60% RH signals issues.
Insulation depth affects ventilation: too much blocks intake. Maintain 2-3″ air channel. We’ve advised on vapor barriers too—place below insulation in cold climates to block moisture migration.
Common Myths About Attic Ventilation Debunked
Myth: More vents always better. Fact: Balance is key; excess exhaust sucks in humid air.
Myth: Fans cure all. Fact: Passive first; fans supplement when ratio can’t meet needs.
Myth: Vents shorten roof life. Fact: Proper venting extends it by reducing heat/moisture cycles.
From field experience, these misconceptions cost homeowners dearly. Education empowers smart choices.
Frequently Asked Questions
Can I improve attic ventilation myself?
Yes, for simple cases like cleaning existing vents or adding gable vents in accessible attics. Success hinges on accurate calculations—use the 1/150 rule for total vent area, ensuring half intake, half exhaust. Tools needed: ladder, drill, caulk gun. We’ve guided many through baffle installs, creating air channels that drop temps 20-30°F. However, if your roof is steep, access tight, or issues involve moisture/mold, pros prevent costly mistakes. DIY suits handy folks with time; expect 4-10 hours labor. Always prioritize safety gear and weatherproof seals to avoid leaks. Long-term, test airflow post-project for true effectiveness.
What are the signs of poor attic ventilation?
Key indicators: higher energy bills from trapped heat, attic temps over 130°F, moisture stains on rafters, curling shingles, ice dams, or musty odors. Dark streaks signal condensation; peeling interior paint below attic points to humidity. In summer, feel roof heat radiating indoors. Use an infrared thermometer—healthy attics stay 20-30°F below outdoor peaks. We’ve diagnosed thousands: blocked soffits cause 70% of issues, starving exhaust. Rust on nails or squeaky rafters from rot are advanced warnings. Early detection saves thousands; ignore them, and mold/wood decay follows. Regular inspections catch 90% proactively.
How much attic ventilation do I need?
Standard: 1 sq ft per 150 sq ft attic floor, balanced 50/50 intake/exhaust. For 2,000 sq ft, that’s 13.3 sq ft total (6.65 each). Use NFVA ratings—not gross area—for accuracy; screens reduce effective flow 50%. Steep roofs or hot climates may need 1/100. Pros measure precisely with anemometers. Add 20% buffer for obstructions. In our projects, under-vented attics averaged 40% deficiency, spiking repair needs. Calculate: length x width / 150 = total vent sq ft. Verify post-install with smoke tests. Codes mandate minimums; exceeding optimizes performance.
DIY vs pro attic ventilation costs?
DIY: $300-1,200 materials (vents, tools). Pro: $2,000-6,000 full system, including assessment, install, sealing. DIY saves labor but risks redo costs equaling pro fees. Blown-in vent retrofits add $500 rental. Pros factor warranties, insurance—value over price. Case: DIY gable add saved $1,500 initially but leaked, costing $3,000 fix. Energy savings from pro work recoup 20-30% yearly. Factor time: DIY weekends vs pro one-day completion. For ROI, pros win long-term via durability. Budget wisely; cheap fixes fail fast.
Is ridge venting better than gable vents?
Ridge vents excel for continuous exhaust along peak, providing 18″ wide path unmatched by gables’ spot flow. Studies show 25-40% better performance in wind-driven attics. Gables suit end walls but short-circuit air if soffits weak. Ideal: ridge + soffits. Filter screens prevent pests. In retrofits, we replace gables with ridge for 35% airflow gains. Cons: ridge needs precise shingle integration. Gables easier DIY. Combine for best: gables supplement ridges in long attics. Test your setup—uneven flow wastes potential. Upgrade strategically for max efficiency.
Do attic fans help with ventilation?
Yes, powered fans boost airflow 1,000-4,000 CFM when passive insufficient. Thermostat models activate at set temps; solar free post-install. Ideal for large/hot attics failing 1/150 ratio. We’ve installed 500+, averaging 40°F drops, cutting AC 15%. Cons: electricity $50/year, noise if undersized. Position high for exhaust. Pair with intake upgrades. Not substitutes—enhance balanced systems. Codes limit use; pros ensure safe wiring. Maintenance: clean blades yearly. ROI: 2-5 years via savings. Skip if passive suffices; overkill wastes energy.
How to clean attic vents myself?
Annual cleaning vital. Gear up: gloves, mask, shop vac, air compressor. Access soffits from eaves—vacuum debris, spray coils if dirty. Gables/ridges: remove screens, brush out nests/leaves. Avoid water near electrics. For turbines, spin and oil bearings. We’ve seen clogs halve NFVA; post-clean airflow jumps 60%. Schedule spring/fall. Pro tip: install mesh guards post-clean. Check insulation encroachment. Full clean: 2-4 hours. Prevent blockages with trim bushes. Consistent maintenance extends vent life 2x.
Does insulation affect attic ventilation?
Absolutely—piled insulation blocks intake 80% of cases. Maintain 2″ air channel via baffles. Blown-in overfills without chutes. Vapor barriers below in cold areas prevent moisture wicking up. We’ve reconfigured many: adding baffles restores flow, drops humidity 25%. R-value gains without vent loss. Pros layer correctly per code. DIY risk: compressing batts slashes performance. Balance: vent first, insulate second. Monitor post-job.
Can poor ventilation cause roof leaks?
Yes, indirectly—heat/moisture degrade shingles 2x faster. Trapped vapor rots decking; ice dams force water under. 50% leak calls trace to vents. Balanced systems expel humid air, dry materials. Ridge/soffit combos prevent 90% issues. We’ve repaired dozens: vent upgrades stopped recurring leaks permanently. Signs: granule loss, soft spots. Act early—pro assessment pinpoints.
When to call pros for attic venting?
Steep roofs, hazards (wiring/asbestos), large/complex attics, existing damage, or code uncertainties. Pros diagnose hidden flaws, ensure balance, warrant work. DIY fine for minors; pros for majors. Our audits reveal 70% overlooked issues. Save time/money long-run. Contact for eval—peace of mind worth it.
Final Thoughts: Make the Smart Choice for Your Home
DIY attic ventilation works for basics if you’re skilled and cautious, but professionals deliver superior, hassle-free results with guarantees. Weigh your skills, attic complexity, and goals. For expert advice tailored to your needs, trust Care Roofing Inc.—your partner in lasting home protection.