Roof flashing is a thin, durable material installed at critical junctions on your roof to direct water away from vulnerable areas, preventing leaks and extensive damage. Its importance cannot be overstated, as it safeguards your home’s structure, extends roof lifespan, and avoids costly repairs.
In the world of roofing, few components work as tirelessly behind the scenes as roof flashing. As experts at Care Roofing Inc. – Your Trusted Roofing Partner, we’ve seen firsthand how proper flashing installation and timely repairs make all the difference in protecting homes from water intrusion. This comprehensive guide dives deep into what roof flashing is, its various types, why it’s essential, common problems, and maintenance tips. Drawing from years of hands-on experience repairing and installing flashing systems, we’ll equip you with the knowledge to keep your roof in top condition.
What Exactly Is Roof Flashing?
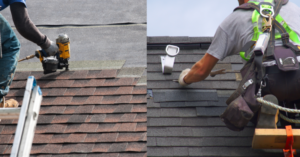
Roof flashing refers to thin sheets of impervious material, typically metal like galvanized steel, aluminum, copper, or lead, or sometimes plastic or rubber, strategically placed around roof penetrations and transitions. These include areas where the roof meets vertical surfaces such as chimneys, walls, dormers, valleys, skylights, vents, and plumbing stacks. The primary function of roof flashing is to create a watertight seal that channels rainwater away from seams and joints, ensuring it flows smoothly into gutters rather than seeping into the roof deck or interior spaces.
Imagine your roof as a vast shield against the elements. Shingles or tiles cover the main surface, but at every intersection—where roof planes change direction or meet protrusions—there’s a potential weak spot. That’s where flashing steps in. It’s layered under shingles on the upper side and over them on the lower side to direct water downward, mimicking the natural flow of rain. Without it, even the smallest amount of water could infiltrate, leading to rot, mold, and structural failure over time.
From our extensive work in the field, we’ve noted that flashing isn’t just a one-size-fits-all solution. Different roof designs demand specific flashing configurations. For instance, step flashing is used along sloped roof-to-wall junctions, while continuous flashing wraps around entire features like chimneys. Understanding these nuances is key to effective installation, which is why professional assessment is crucial. For specialized Expert Roof Flashing Repair Services You Can Trust, always consult seasoned pros who know the intricacies.
Types of Roof Flashing: A Detailed Breakdown
To fully grasp the role of roof flashing, it’s essential to explore its various types, each engineered for specific applications. Here’s an in-depth look:
- Step Flashing: This L-shaped pieces are installed in overlapping steps along roof-to-wall intersections, particularly on sloped roofs. Each piece tucks under a course of shingles, creating a series of barriers that force water to shed downward. Ideal for side walls and dormers, step flashing prevents lateral water movement that could otherwise climb up under shingles.
- Counter Flashing: Often paired with base flashing, counter flashing is embedded into the masonry or siding above the roofline. It overlaps the base to form a robust seal against wind-driven rain. This type is common around chimneys and is bent to fit irregular surfaces, ensuring long-term protection.
- Base (or Apron) Flashing: Installed at the bottom of vertical surfaces meeting the roof, this continuous piece extends up the wall and out over the roof deck. It acts as the first line of defense, apron-like, directing bulk water away immediately.
- Valley Flashing: Placed in roof valleys where two sloping planes converge, this wide, woven or continuous material handles high volumes of water flow. Woven valley flashing interlaces with shingles for seamless integration, while continuous types provide superior leak resistance in heavy rain areas.
- Pipe (or Vent) Flashing: Conical rubber or metal boots that seal around plumbing vents and exhaust pipes. Flexible rubber versions accommodate thermal expansion, while metal ones offer durability in extreme conditions.
- Saddle Flashing: Custom-fitted for cricket divergences behind chimneys, these wedge-shaped pieces divert water around obstructions, preventing pooling.
- Cap Flashing: Covers the top edges of walls or chimneys, overlapping both sides to shield against downward water penetration.
Each type serves a unique purpose, and selecting the right one depends on roof pitch, material, and exposure. In our projects, we’ve found that combining types—like step and counter flashing around chimneys—yields the best results. Materials also vary: aluminum for affordability, copper for longevity (up to 50+ years), and galvanized steel for cost-effectiveness. Lead is malleable for complex shapes, while PVC suits low-slope roofs.
Why Is Roof Flashing So Important? Key Benefits Explained
The importance of roof flashing extends far beyond mere water diversion. It underpins your home’s overall integrity. Let’s break down the critical benefits:
1. Leak Prevention and Water Damage Avoidance: By sealing vulnerable joints, flashing stops water from penetrating the underlayment and decking. Unprotected seams allow moisture to wick into sheathing, causing delamination and rot. We’ve repaired countless roofs where missing flashing led to interior ceiling stains and drywall replacement costs exceeding thousands.
2. Extended Roof Lifespan: Proper flashing preserves roofing materials by keeping them dry. Shingles last 20-30 years when protected, but water exposure halves that. Flashing reduces premature granule loss and cracking, delaying full replacement.
3. Structural Protection: Water infiltration weakens rafters, trusses, and fascia boards. Rot compromises load-bearing capacity, risking sagging or collapse. Flashing maintains dry conditions, upholding safety standards.
4. Mold and Mildew Prevention: Moist environments breed mold, which spreads indoors via HVAC systems, posing health risks. Flashing ensures quick drying, minimizing spore growth.
5. Energy Efficiency Gains: Dry insulation performs optimally, preventing heat loss through wet spots. This reduces HVAC strain, lowering utility bills by up to 10-15% in some cases.
6. Pest Deterrence: Sealed roofs block entry for rodents and insects seeking water sources at eaves and valleys.
7. Aesthetic and Property Value Enhancement: Well-maintained flashing prevents unsightly stains and curling shingles, boosting curb appeal and resale value. Premium materials like copper patina beautifully over time.
Statistics underscore this: improper flashing contributes to 30-40% of roofing claims, per industry data. Investing upfront saves exponentially on repairs.
Common Signs Your Roof Flashing Needs Repair or Replacement
Even the best flashing deteriorates. Early detection prevents escalation. Watch for:
- Curling, lifting, or missing flashing edges.
- Rust, corrosion, or pitting on metal surfaces.
- Water stains on ceilings or walls below affected areas.
- Granule buildup in gutters from accelerated shingle wear.
- Cracks or splits in rubber pipe boots.
- Moss or algae growth indicating chronic moisture.
In one notable case from our service logs, a homeowner ignored minor rust on valley flashing, leading to a valley leak that rotted multiple rafters. Timely Professional Roof Replacement and Repair Expertise averted disaster. Regular inspections reveal these issues before they worsen.
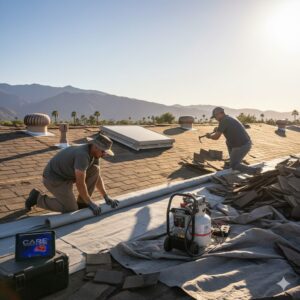
How Roof Flashing Is Installed: Professional Insights
Installation demands precision. Professionals begin with underlayment, then layer flashing per code: high-side under shingles, low-side over. Sealants like butyl tape enhance bonds. For complex jobs, custom fabrication ensures fit. DIY attempts often fail due to improper overlap (minimum 2 inches) or sealant choice, leading to callbacks.
Maintenance involves annual visual checks, cleaning debris, and resealing as needed. Harsh weather accelerates wear, so post-storm inspections are vital.
Materials Comparison: Choosing the Best for Your Roof
MaterialDurabilityCostBest ForGalvanized Steel20-30 yearsLowBudget roofsAluminum15-25 yearsLow-MediumLightweight needsCopper50+ yearsHighPremium, historicLead40+ yearsHighComplex shapesRubber/PVC10-20 yearsLowPipe boots
Selection hinges on climate, roof type, and budget. Copper excels in corrosive environments; aluminum suits coastal areas.
Case Studies: Real-World Impact of Roof Flashing
Our team’s experience includes rescuing a 20-year-old asphalt shingle roof with failed step flashing along a dormer. Water had saturated insulation, fostering mold. Replacing with copper step and counter flashing restored integrity, saving a full re-roof. Another involved valley flashing failure after high winds, where woven metal prevented further intrusion during repairs.
These examples highlight that 80% of roof leaks stem from flashing issues, reinforcing proactive care.
Frequently Asked Questions
What is roof flashing made of?
Roof flashing is typically crafted from durable, weather-resistant materials such as galvanized steel, aluminum, copper, stainless steel, lead, or flexible options like rubber and PVC. Galvanized steel offers a zinc coating for rust resistance, lasting 20-30 years in moderate climates. Aluminum is lightweight and affordable but can corrode in acidic rain. Copper develops a protective patina, enduring 50+ years with minimal maintenance, making it ideal for premium installations. Lead provides malleability for custom fits around irregular features like chimneys. Rubber boots seal pipe penetrations, accommodating expansion. Material choice depends on roof type, exposure, and budget. For instance, metal roofs pair well with matching metals to avoid galvanic corrosion. Professionals assess compatibility to ensure longevity, preventing premature failure and costly replacements. Proper material selection enhances waterproofing, structural protection, and aesthetic harmony.
Why is roof flashing important for preventing leaks?
Roof flashing is crucial for leak prevention because it directs water away from seams, joints, and penetrations where leaks commonly originate. Without it, rainwater infiltrates under shingles, rotting sheathing and rafters. Flashing creates overlapping barriers that channel water to gutters, protecting vulnerable transitions like chimneys and valleys. It reduces water damage risks by 70-80%, per industry estimates. In heavy storms, wind-driven rain exploits gaps; flashing counters this. Poor installation leads to interior damage, mold, and electrical hazards. Regular maintenance extends its efficacy, saving thousands in repairs. Understanding its role empowers homeowners to prioritize inspections, ensuring a dry, safe home.
How long does roof flashing last?
The lifespan of roof flashing varies by material and environment: galvanized steel 20-30 years, aluminum 15-25 years, copper 50-100 years, rubber 10-20 years. Factors like UV exposure, pollution, and installation quality influence durability. Coastal salt air accelerates corrosion, shortening life by 20-30%. Quality sealants and overlaps extend performance. Annual inspections catch early wear like pitting or lifting. Replacement aligns with re-roofing cycles every 20-30 years. Investing in premium materials yields long-term savings, as copper rarely needs mid-life intervention. Professional evaluation determines precise longevity for your setup, preventing unexpected failures.
What are the signs of failing roof flashing?
Signs of failing roof flashing include visible rust or corrosion, curling/lifting edges, cracks in rubber seals, water stains on ceilings/walls, granule accumulation in gutters, moss growth, and shingle damage nearby. Interior musty odors or mold signal infiltration. Exterior checks reveal loose pieces post-storm. Early detection via biannual inspections averts escalation. Ignoring rust leads to pinhole leaks; cracked boots allow steady drips. Document issues for warranty claims. Prompt repair restores protection, avoiding structural rot costing $5,000+. Trained eyes spot subtle failures invisible to novices.
Can I install roof flashing myself (DIY)?
DIY roof flashing installation is not recommended for most homeowners due to complexity, safety risks, and code requirements. Precision overlaps, sealant application, and material compatibility demand expertise. Heights, steep pitches, and tools pose dangers; falls injure thousands yearly. Improper work voids warranties and causes leaks. Professionals use lifts, ensure layering (under shingles high-side), and match materials. Cost savings are offset by redo expenses. For simple pipe boots, kits exist, but full systems need pros. Consult experts for assessments to guarantee watertight results and insurance compliance.
How much does roof flashing repair cost?
Roof flashing repair costs range from $200-$1,500 per section, depending on type, material, accessibility, and extent. Simple pipe boot replacement: $200-400; chimney flashing: $500-1,200; full valley: $800-2,000. Labor comprises 60%, materials 40%. Emergency calls add premiums. Comprehensive inspections ($100-300) prevent surprises. Premium copper hikes prices but lasts longer. Multiple areas qualify for bundles, saving 10-20%. Free quotes clarify scopes. Investing averts $10,000+ leak damages. Factor warranties (5-20 years) for value.
What happens if roof flashing fails?
Failed roof flashing leads to leaks, rotting sheathing/rafters, mold proliferation, insulation failure, energy loss, pest infestations, and sagging ceilings. Water erodes structural integrity, risking collapse. Mold triggers health issues like respiratory problems. Electrical shorts from wet wiring spark fires. Repair bills soar: minor $500, severe $20,000+. Aesthetics suffer with stains. Early intervention halts progression, preserving equity. Insurance may deny non-maintained claims. Proactive care mitigates these cascading effects, safeguarding investments.
Is roof flashing required by building codes?
Yes, roof flashing is mandated by most building codes (e.g., IRC Section R905) at valleys, chimneys, walls, penetrations, and edges. Minimum overlaps, materials, and installation standards ensure safety. Codes specify metal for durability, prohibiting subpar substitutes. Compliance passes inspections, secures insurance, and upholds warranties. Variations exist by jurisdiction, but essentials persist. Deviations invite fines or failed certifications. Verify local amendments; professionals navigate nuances seamlessly.
How do I maintain roof flashing?
Maintain roof flashing with biannual inspections: check for damage, clean debris, reseal joints with polyurethane. Trim overhanging branches. Post-storm, scan for shifts. Avoid pressure washing metals to prevent sealant stripping. Lubricate rubber annually. Monitor attic for stains. Professional tune-ups every 5 years extend life. Documentation aids claims. Consistent vigilance prevents 90% of failures, optimizing performance.
Does roof flashing improve energy efficiency?
Yes, roof flashing boosts energy efficiency by preventing moisture damage to insulation, which loses 50% R-value when wet. Dry barriers minimize air leaks, stabilizing temperatures. Reduced HVAC load cuts bills 5-15%. Sealed joints curb drafts at eaves. Long-term, it preserves envelope integrity, complementing modern systems. Holistic roofing enhances sustainability.
Conclusion: Prioritize Roof Flashing for a Secure Home
Roof flashing is the unsung hero of roofing systems, indispensable for leak-proofing, durability, and safety. By understanding its role, types, and maintenance, you empower better decisions. Partner with trusted experts like Care Roofing Inc. for inspections and repairs to fortify your roof against the elements.